KVM再入門:Qemuコマンドラインで仮想マシンを起動し、Windows11ゲストをセットアップする。
はじめに
前回に引き続き、KVM仮想マシン上にWindows11をインストールするやり方をまとめておきます。
Windows10の時とは以下のような違いがあります。
-
Windows11の場合、TPMとUEFI Secure Bootが必須である。
-
KVMでTPMを使うには、ホストの/dev/tpm0をパススルーで使う方法と、ソフトウェアのTPMデバイスエミュレーター(swtpm)を使う方法がある。
-
KVMでUEFI Secure Bootするには、ovmfパッケージにより提供されるUEFI firmwareを利用する。
Window11のインストール
KVM仮想マシンの起動方法
Windows11のインストールメディア、virtioドライバインストール用のisoイメージをダウンロードしておきます。
必要パッケジージのインストール
sudo apt-get install qemu-system-x86 virt-viewer ovmfqcow2ディスクイメージを作成します。
qemu-img create -f qcow2 win11pro.qcow2 40G書き込み用のFirmwareのローカルコピーを作成します。
cp /usr/share/OVMF/OVMF_VARS_4M.ms.fd ./ホストの/dev/tpm0をパススルーで使う場合
以下のコマンドで仮想マシンを起動できます。
sudo qemu-system-x86_64 \
    -machine q35,accel=kvm \
    -m 8192 -cpu host \
    -smp 6,sockets=1,dies=1,cores=6,threads=1 \
    -display spice-app \
    -drive file=./win11pro.qcow2,if=virtio,format=qcow2,discard=unmap \
    -drive file=~/Downloads/Win11_22H2_Japanese_x64v1.iso,index=0,media=cdrom \
    -drive file=~/Downloads/virtio-win-0.1.229.iso,index=1,media=cdrom \
    -drive if=pflash,format=raw,unit=0,file=/usr/share/OVMF/OVMF_CODE_4M.ms.fd,readonly=on \
    -drive if=pflash,format=raw,file=./OVMF_VARS_4M.ms.fd \
    -tpmdev passthrough,id=tpm0,path=/dev/tpm0,cancel-path=/dev/null \
    -device tpm-tis,tpmdev=tpm0 \
ソフトウェアのTPMデバイスエミュレータを使う場合
TPMデバイスエミュレータswtpmを起動しておきます。
mkdir mytpm
swtpm socket --tpmstate dir=./mytpm \
--tpm2 \
--ctrl type=unixio,path=./mytpm/swtpm-sock \
--log level=20
以下のコマンドで仮想マシンを起動できます。
sudo qemu-system-x86_64 \
-machine q35,accel=kvm \
-m 8192 -cpu host \
-smp 6,sockets=1,dies=1,cores=6,threads=1 \
-display spice-app \
-drive file=./win11pro.qcow2,if=virtio,format=qcow2,discard=unmap \
-drive file=~/Downloads/Win11_22H2_Japanese_x64v1.iso,index=0,media=cdrom \
-drive file=~/Downloads/virtio-win-0.1.229.iso,index=1,media=cdrom \
-drive if=pflash,format=raw,unit=0,file=/usr/share/OVMF/OVMF_CODE_4M.ms.fd,readonly=on \
-drive if=pflash,format=raw,file=./OVMF_VARS_4M.ms.fd \
-chardev socket,id=chrtpm,path=./mytpm/swtpm-sock \
-tpmdev emulator,id=tpm0,chardev=chrtpm \
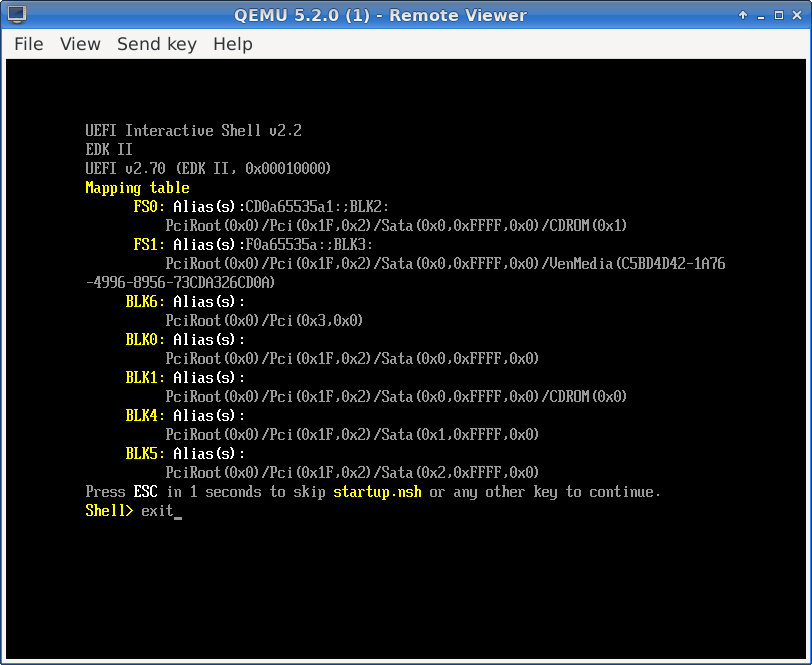
-device tpm-tis,tpmdev=tpm0 \仮想マシンが立ち上がると、UEFシェルが起動してしまう。
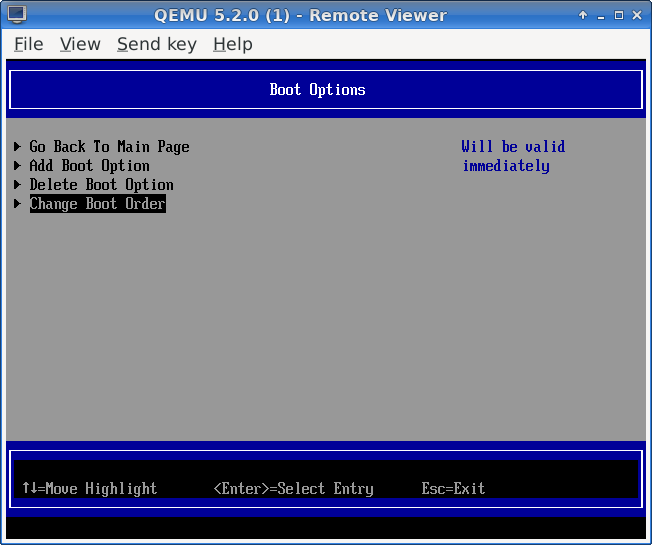
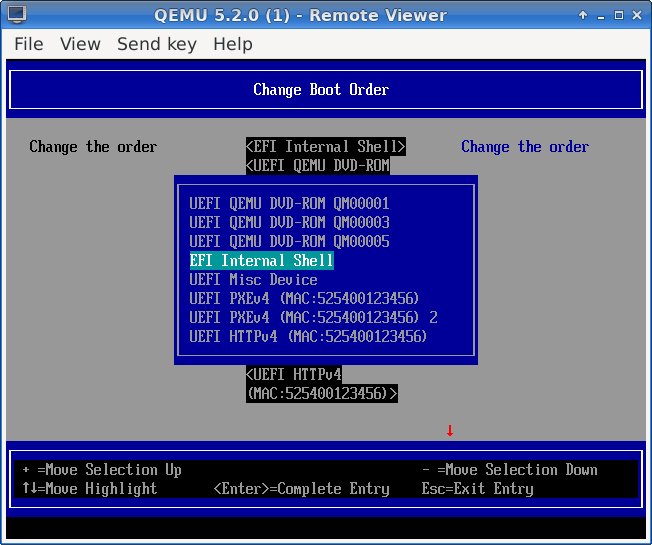
どうやらUEFIブートの場合、UEFIの設定画面でブートデバイスの優先順位を変更してやる必要があるようです。 UEFIシェルをexitで抜けるとUEFIの設定メニューに入るので、そこでUEFIシェルの優先順位をCDROM/DVDROMなどインストールメディアよりも低くします。 そして、RestまたはContinueで、Windowsインストール用のCDROMからブートします。
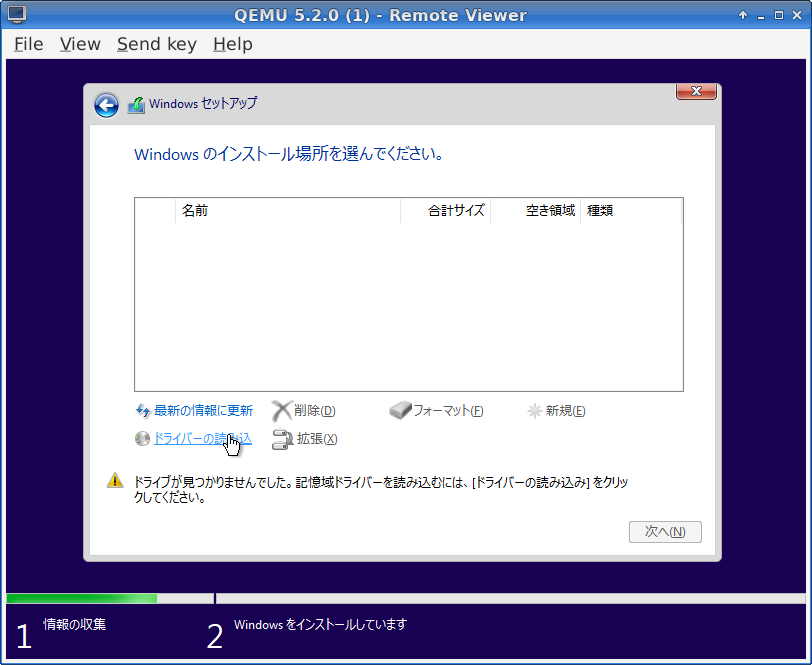
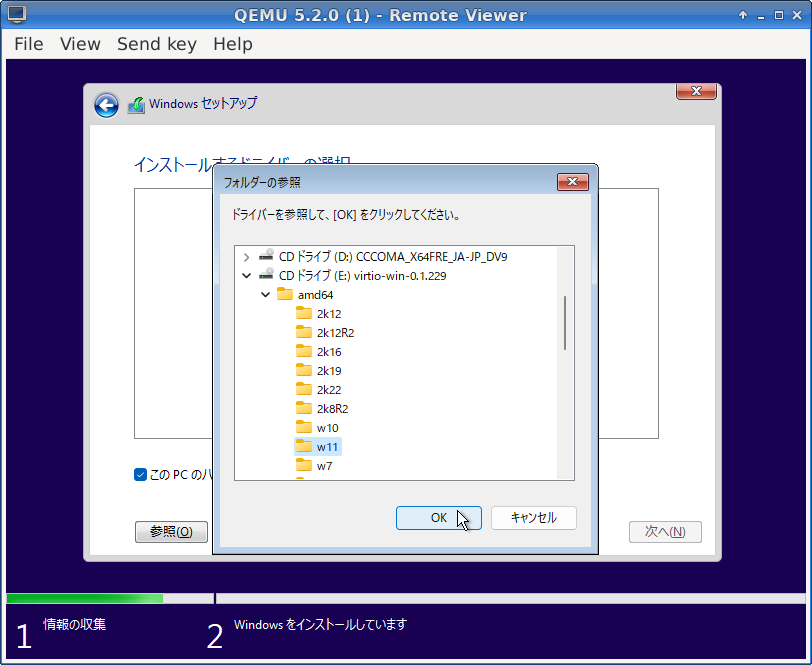
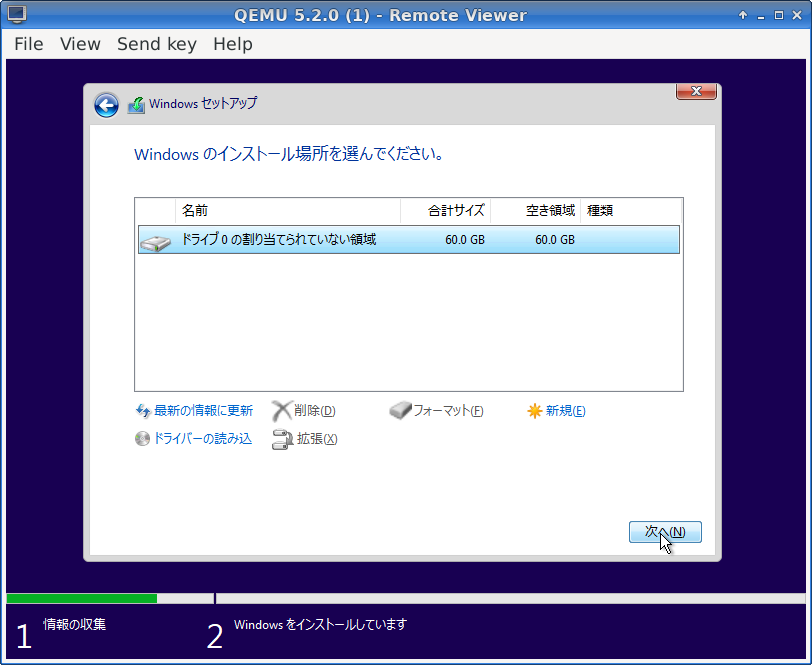
インストール先のドライブが見えない
E:ドライブ(virtio-win-xx)にあるドライバを読み込むと、qcow2のディスクイメージが見えるようになるので、そこにWindows11をインストールします。
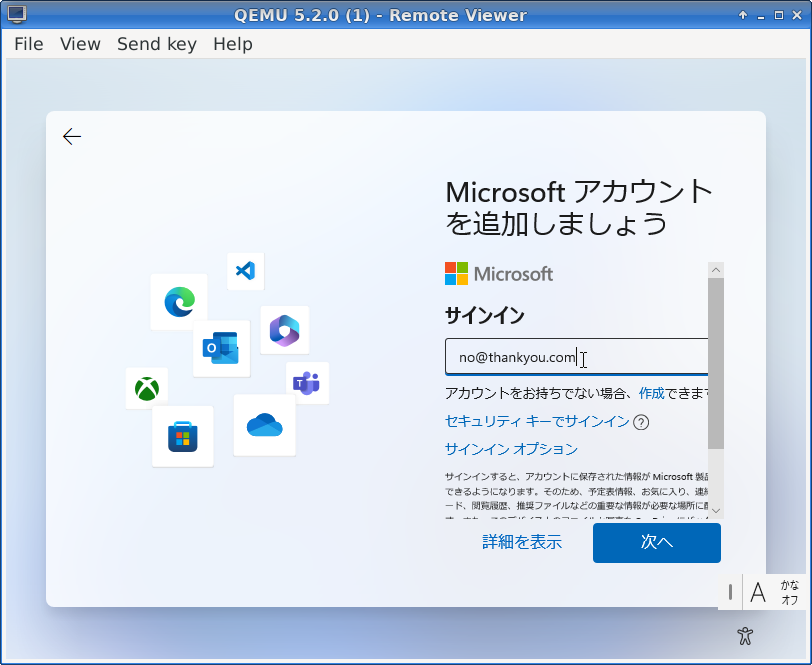
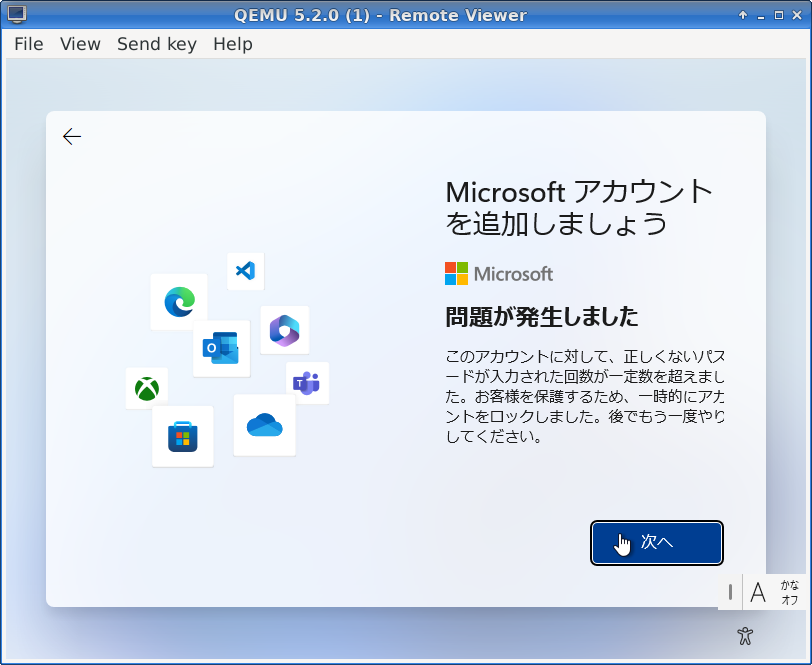
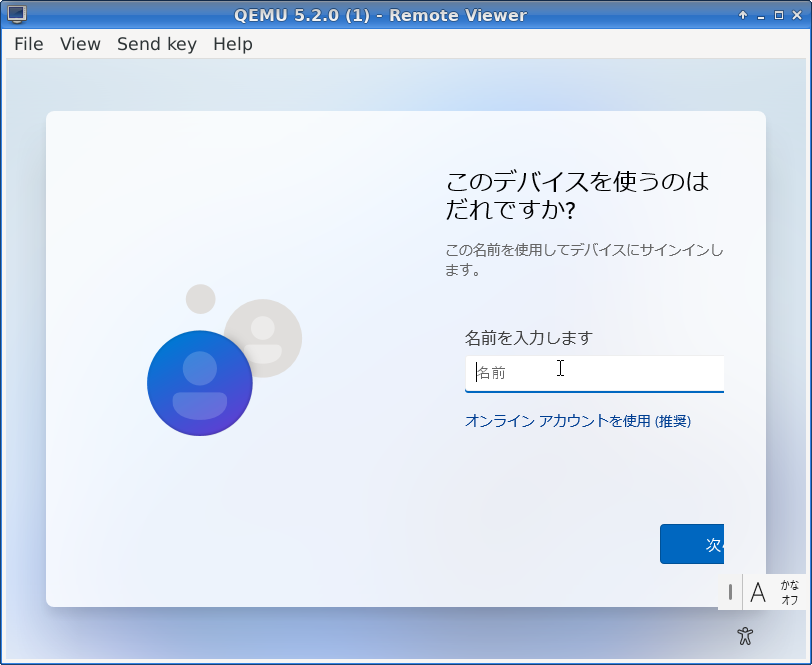
インストール時にMicrosoftアカウントへのサインインを求められる
no@thankyou.comで一度サインインに失敗すると、ローカルアカウントが作成できます。
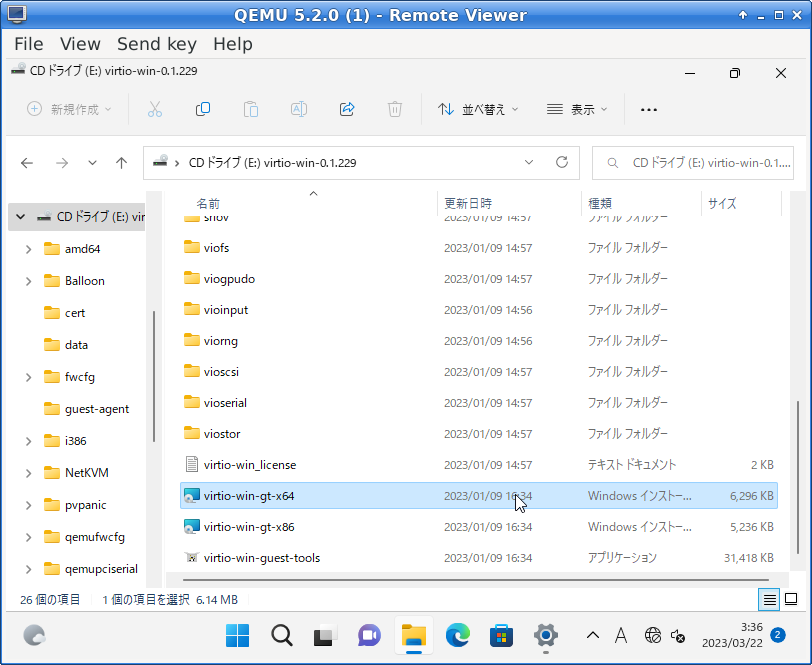
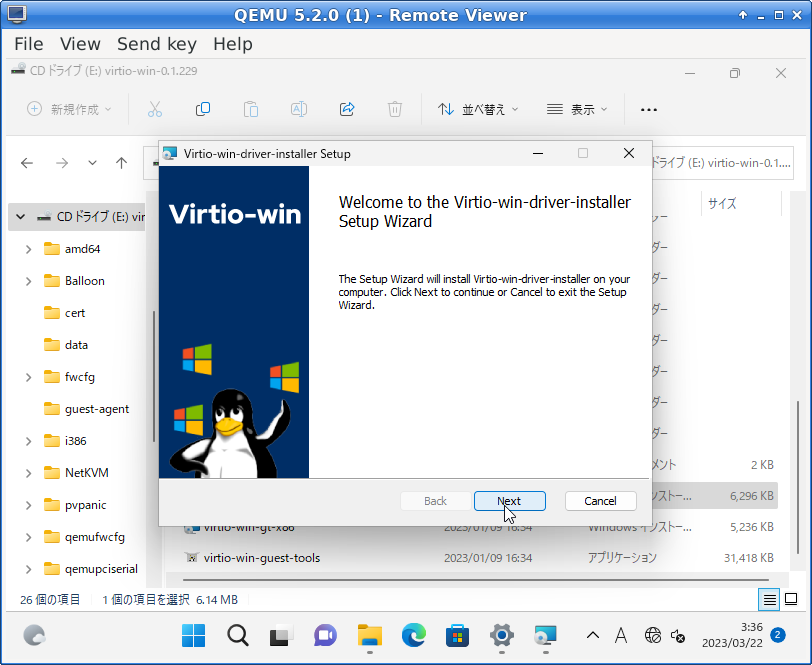
残りのvirtioドライバーをインストール
Windowsセットアップ完了後、Windows上でE:ドライブ(virtio-win-0.1.229)を開きます。そこにあるインストーラを起動し、virtioドライバをインストールしておきます。
以上で、ネットワーク関連は未設定状態ですが、Windows11がインストールされたqcow2ディスクイメージ、win11pro.qcow2ができあがります。
普段使いのために
Windows11のインストールは、ネットワーク無しで行った。仮想マシン上のWindows11を利用するには、ネットワークが使えないと困るでしょう。 ネットワークを使えるようにするためには、次の3つの準備が必要です。
-
Linuxホスト上でのネットワーク設定
-
KVM起動コマンドをネットワークが使えるように修正
-
Windows11ゲストマシン上でネットワーク設定
Linuxホストのネットワークセットアップ
Linuxホスト上では、以下の設定を行えば十分です。
brdg=kbr0
outif=wlan0
addr=10.0.0.254/24

# ブリッジインターフェースの準備
brctl addbr $brdg
ip add add dev $brdg $addr
ip link set dev $brdg up

# IPマスカレード設定
iptables -t nat -A POSTROUTING -s $addr -o $outif -j MASQUERADE

# IPフォワーディング許可
echo 1 >  /proc/sys/net/ipv4/conf/$outif/forwarding
echo 1 >  /proc/sys/net/ipv4/conf/$brdg/forwarding
念の為、上記で用意したものをもとに戻すのは、以下のやり方で良いでしょう。
# IPフォワーディング許可を取り消す
echo 0 >  /proc/sys/net/ipv4/conf/$outif/forwarding
echo 0 >  /proc/sys/net/ipv4/conf/$brdg/forwarding

# ブリッジインターフェースを消す
ip link set dev $brdg down
brctl delbr $brdg

# IPマスカレード設定を消す
iptables -t nat -D POSTROUTING -s $addr -o $outif -j MASQUERADE
Windowsゲスト起動コマンド
qemuコマンドはオプションが多いのでスクリプト化しておくと良いでしょう。
run.win11.sh:
#!/bin/bash

sudo qemu-system-x86_64 \
        -m 8192 -cpu host \
        -smp 6,sockets=1,dies=1,cores=6,threads=1 \
        -drive file=./win11pro.qcow2,if=virtio,format=qcow2,discard=unmap \
        -display spice-app \
        -machine q35,accel=kvm \
        -rtc base=localtime,clock=host \
        -drive if=pflash,format=raw,unit=0,file=/usr/share/OVMF/OVMF_CODE_4M.ms.fd,readonly=on \
        -drive if=pflash,format=raw,file=./OVMF_VARS_4M.ms.fd \
        -tpmdev passthrough,id=tpm0,path=/dev/tpm0,cancel-path=/dev/null \
        -device tpm-tis,tpmdev=tpm0 \
        -device virtio-net-pci,netdev=dev1,mac=52:54:00:11:00:12,id=net1 \
        -netdev tap,id=dev1,vhost=on,script=./qemu-ifup
仮想マシン起動時にデバイスをホストのブリッジにアタッチします。
qemu-ifup:
#!/bin/sh

bridge=kbr0
/sbin/ip link set dev $1 up promisc off
/sbin/brctl addif $bridge $1
Windowsゲストのネットワーク設定
次のアドレスを設定
IPv4アドレス: 10.0.0.1/24
ゲートウェイ: 10.0.0.254
DNSサーバ: 192.168.40.1(Linuxホストと同じ設定にすると良いと思う。)
この他に、Windows 11 Proの場合はRemote Desktop機能があるので、利用可能にしておくと良いでしょう。
その他のTips
- 一旦ビューワーを閉じたあともう一度接続するには
$ sudo virt-viewer -c spice+unix:///tmp/.JVB811/spice.sock- Remote Desktop接続は、例えば次のようにする
user=ktaka
xfreerdp /u:$user /size:1900x1000 +fonts +clipboard /audio-mode:1 /v:10.0.0.1- qemu起動時にはwindowを表示せず、rdpのみで使うには
--display spice-appを--display noneにすれば良い。
参考文献
QemuでのTPMの使い方
以下のドキュメントに十分な情報があります。
QEMUでのUEFI Secure
Bootのやり方
どのUEFI
firmwareを使うべきか
Debianのドキュメントに書いてあります。
-
Secure Boot pre-enabledな、OVMF_CODE_4M.ms.fdとOVMF_VARS_4M.ms.fdをセットで使う。
-
前者はRead Onlyで、後者はコピーしたものをRead Write可能な状態で利用する。
-
UEFIのメニューでSaveした設定変更は、OVMF_VARS_4M.ms.fdのコピーに書き込まれる。
/usr/share/doc/ovmf/README.Debian
The OVMF_CODE*.fd files provide UEFI firmware for a QEMU guest that is
intended to be read-only. The OVMF_VARS*.fd files provide UEFI variable
template images which are intended to be read-write, and therefore each
guest should be given its own copy. Here's an overview of each of them:

OVMF_CODE_4M.fd
  Use this for booting guests in non-Secure Boot mode. While this image
  technically supports Secure Boot, it does so without requiring SMM
  support from QEMU, so it is less secure. Use the OVMF_VARS.fd template
  with this.

OVMF_CODE_4M.ms.fd
  This is a symlink to OVMF_CODE_4M.secboot.fd. It is useful in the context
  of libvirt because the included JSON firmware descriptors will tell libvirt
  to pair OVMF_VARS.ms.fd with it, which has Secure Boot pre-enabled.

OVMF_CODE_4M.secboot.fd
  Like OVMF_CODE_4M.fd, but will abort if QEMU does not support SMM.
  Use this for guests for which you may enable Secure Boot. Be aware
  that the included JSON firmware descriptors associate this with
  OVMF_CODE_4M.fd. Which means, if you specify this image in libvirt, you'll
  get a guest that is Secure Boot-*capable*, but has Secure Boot disabled.
  To enable it, you'll need to manually import PK/KEK/DB keys and activate
  Secure Boot from the UEFI setup menu. If you want Secure Boot active from
  the start, consider using OVMF_CODE.ms.fd instead.

OVMF_VARS_4M.fd
  This is an empty variable store template, which means it has no
  built-in Secure Boot keys and Secure Boot is disabled. You can use
  it with any OVMF_CODE image, but keep in mind that if you want to
  boot in Secure Boot mode, you will have to enable it manually.

OVMF_VARS_4M.ms.fd
  This template has distribution-specific PK and KEK1 keys, and
  the default Microsoft keys in KEK/DB. It also has Secure Boot
  already activated. Using this with OVMF_CODE.ms.fd will boot a
  guest directly in Secure Boot mode.

OVMF32_CODE_4M.secboot.fd
OVMF32_VARS_4M.fd
  These images are the same as their "OVMF" variants, but for 32-bit guests.

OVMF_CODE.fd
OVMF_CODE.ms.fd
OVMF_CODE.secboot.fd
OVMF_VARS.fd
OVMF_VARS.ms.fd
  These images are the same as their "4M" variants, but for use with guests
  using a 2MB flash device. 2MB flash is no longer considered sufficient for
  use with Secure Boot. This is provided only for backwards compatibility.

OVMF_VARS_4M.snakeoil.fd
  This image is **for testing purposes only**. It includes an insecure
  "snakeoil" key in PK, KEK & DB. The private key and cert are also
  shipped in this package as well, so that testers can easily sign
  binaries that will be considered valid. Intended for use with
  OVMF_CODE_4M.secboot.fd.

PkKek-1-snakeoil.key
PkKek-1-snakeoil.pem
  The private key and certificate for the snakeoil key. Use these
  to sign binaries that can be verified by the key in the
  OVMF_VARS.snakeoil.fd template. The password for the key is
  'snakeoil'.

 -- dann frazier , Fri, 11 Dec 2020 17:30:59 -0700
まとめ
QEMUコマンドのみでKVM仮想マシンを起動し、Windows11をインストールする方法についてまとめました。 Window10の場合との違いは、TPM及びUEFI Secure Bootが必須であることです。 Windows11の場合も、GUIプログラムvirt-managerでのインストール方法はネット上でよく見かけますが、qemuコマンドのみでのやり方はあまり多くないようです。 余計なものはなるべくインストールしたくない人、ソフトウェアスタックをミニマムに保って中身を理解しながら使いたい人の役に立てば幸いです。